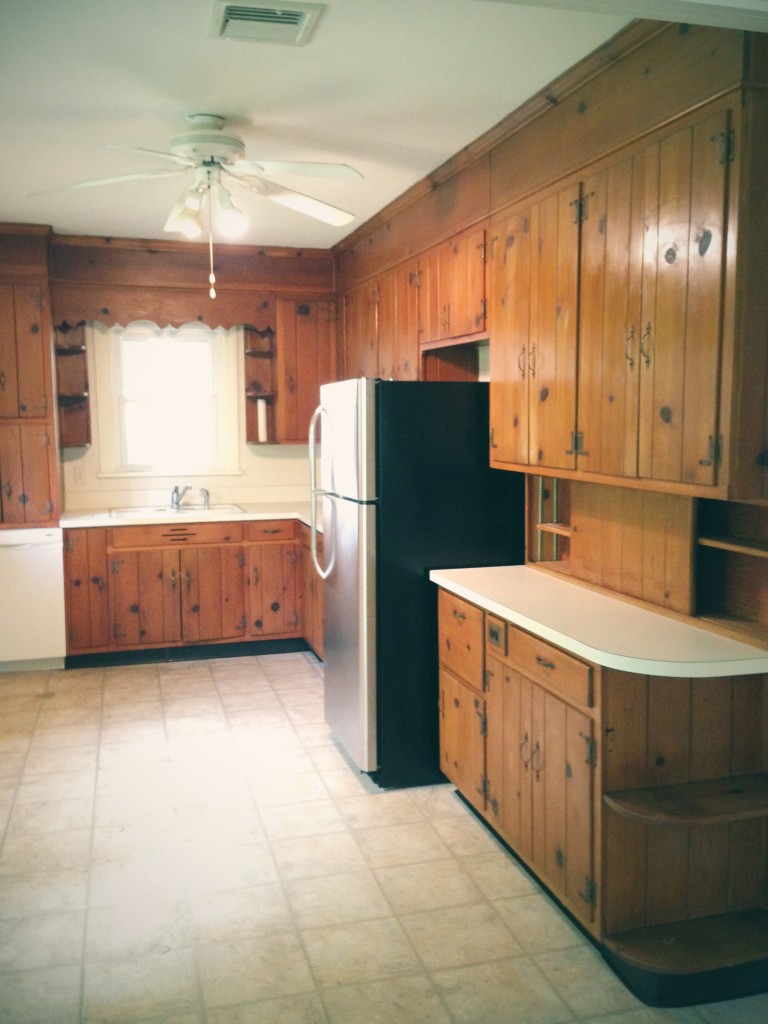
Somewhere along the 70+ years of this little historical cape cod’s existence, someone who lived here had a fascination with cabins. Like knotty pine & corner shelves & hammered iron hardware cabin. And while I love a good cabin [I’m a Wisconsin-born girl after all, we love our lake cabins!] — the cabin look was so terribly wrong for a kitchen in this charming brick cape cod. Though I do give those cabin-loving kitchen designers credit for taking the cabinets all the way to the ceiling! Nicely done.
If you’re new here, my name is Tera Janelle. The short of it is we’re certifiable house addicts. In the past 7 years we’ve renovated 12 houses/flats. And just about the time things start looking pretty enough to have people over (you know, beyond bare studs and exposed electrical wires) we somehow get the crazy notion to do it all over again! So about 8 months ago we moved into this (potentially) charming brick cape cod. And the rest is, well, lots of renovation dust and history.
So when I realized Linda of Calling it Home was kicking off the Spring 2015 One Room Challenge – I knew it was “cape gone cabin” kitchen time!!
The One Room Challenge is a 6-week journey to finish a room. Each Thursday I’ll post pics of the kitchen progress, and you can follow along on Calling it Home as other ridiculously, uber talented designers do the same. (Seriously, it’s a heaping dose of inspiration and intimidation to be posting in leagues with these creatives. But it is so fun to get an inside-peek into the progress of all these talented designers, stylists, and DIYers!) Reveals are Thursday, May 7!
So this kitchen is headed back to Historic. Hopefully the final design will settle into a practical and appealing balance between classic and modern. There’s plans for gray cabinets, gold hardware, classic marble, and a bit of sparkle! And we’ll document the pretty, the frustrating, and all the dust & designs along the way!
So here’s “A Knotty Pine Kitchen Goes Classic” PLAN A:
(Because we never get to the end of a project without rolling over to at least Plan M.)
Details coming soon!
Confession: We jumpstarted this project several months ago, cause we had a 6 week wait just for the cabinets to arrive. So we definitely fudged this 6 week timeline a bit — now fingers crossed we can still be done by May!


Wow – that’s a lot of pine! Can’t wait to see how it turns out….I dig your plan!
Erin, thanks for the encouragement! I’m so excited to
follow alongstalk the rest of the One-Room-Challenger creatives! It’s like getting to house-peep without all the creepiness. :) I’m so grateful for the motivation and inspiration the challenge offers! [P.S. LOVE the navy and layout of your blog!]Cannot wait to see how you paint the pine. I am about to redo a den with pine with a high-gloss paint,
but am afraid to move forward. What kind of paint are you using? I am thinking of Fine Paints of Europe
in a high gloss. Worried about anything showing through.
LTM,
Thanks for stopping by! LOVE the high gloss idea! What color?!
We are reconfiguring the placement of the appliances in the kitchen (there’s no place for an oven. we’re guessing at one point there was a wall oven?). So we are buying new cabinets to accommodate the new layout. We sold the pine cabinets on Craigslist to an entirely spunky & creative woman who was going to install them in her own kitchen and then paint them. I should have asked her to email pictures when she’s done! She was so much fun!
We did just paint some pine in another space, though! We are in the midst of finishing off a lower level and it has “lawyer’s paneling.” Valspar’s traditional latex sealing primer did the trick (applied with a sprayer). But in the past we’ve sometimes used oil & lacquer based primers to prevent tannins from seeping. If you have just a few spots you’re worried about, you can try a latex primer and let it sit for a day or two to allow time for any pesky tannins to seep. If you can create a humid space after priming – it helps to pull out the tannins that might lay low now but appear down the road. Then Kilz Upshot Aerosol (spray can) works great for spot treating seeping stains, without having to worry about oil-based clean up!
Keep me updated on what process you decide to use! Are you documenting your project online? I’d love to follow along. You had me at high-gloss paint! :)
Tera