 [ It is week 3 of The One Room challenge. If you haven’t heard of Calling it Home’s One Room Challenge or missed last week’s post, you can find those here! ]
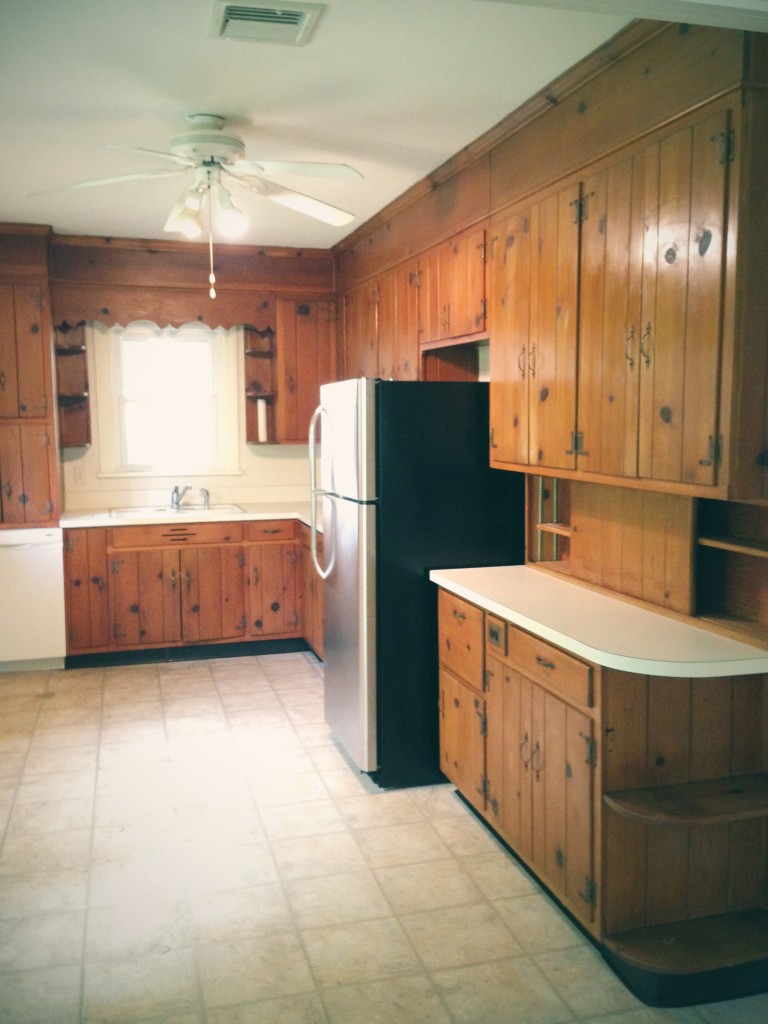
CONFESSION: We got a head start on this project several months ago, because when it comes to kitchen remodels, there is so much waiting. 6 weeks for cabinets to arrive, 2 more weeks til cabinet install, 3 weeks for counter template and production = we cheated a bit to get a head start! Thank you for following along and picking up with us midway in this knotty pine kitchen renovation! :)
Some days in a renovation are lackluster, we can slave all day and at the end of the day, nothing seems to have visually changed. But those days are part of process too (ex. trim painting days, sigh). But other days, other days are entirely revolutionary! My favorite such days are demo days and drywall days… and Kitchen Cabinet Install Days!
I cannot put to words how excited I was for these kitchen cabinets to be installed. I expressed my excitement mainly via singing and dancing around the room like a five-year-old, which doesn’t translate well into type beyond WEEEE! I LOVE THIS DAY!!!!!! THIS DAY! THIS DAY IS MY MOST FAVORITE DAY IN THE WORLD!!! And well, that looks all crazy in type. ;)
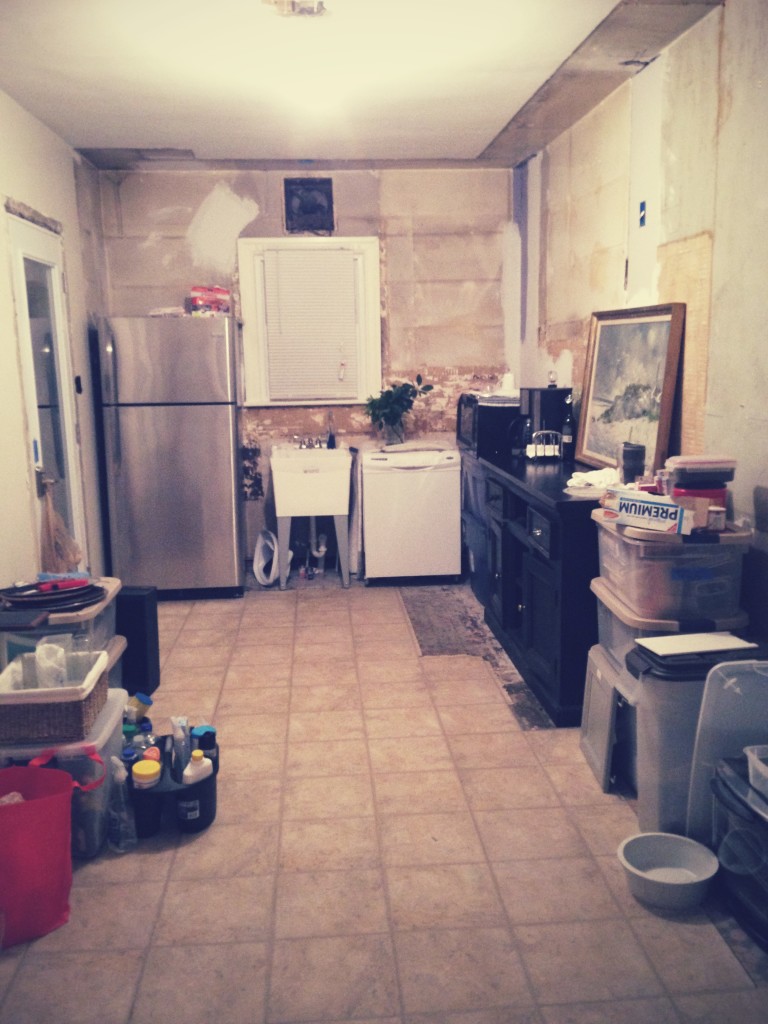
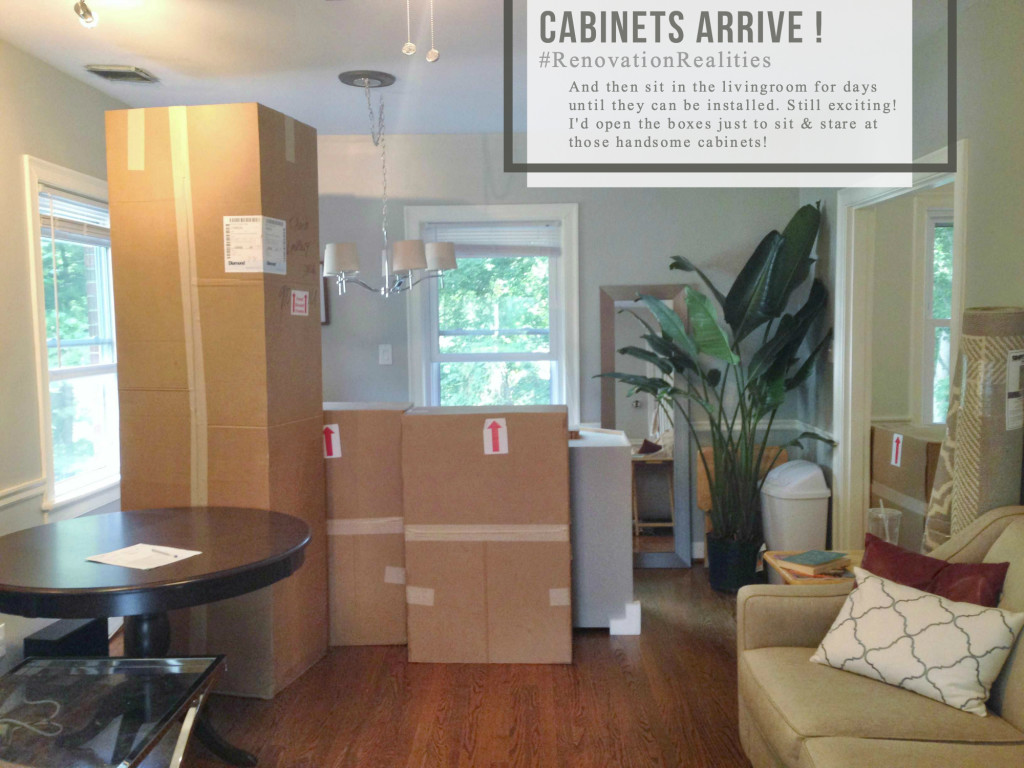
We’d sold the original knotty pine cabinets on Craigslist and were living out of plastic storage tubs, storing food in random places to keep it from our Black Lab, and using a cheapo laundry sink to wash dishes. #partoftheprocessiknow #stillnotfun In fact, we’d become such experts at living out of Rubbermaid tubs, I’d forgotten what it is like to have a place to put dishes away! Let me tell you, IT. IS. AWESOME.
If you’re just joining the kitchen progress, here’s the kitchen transformation so far :
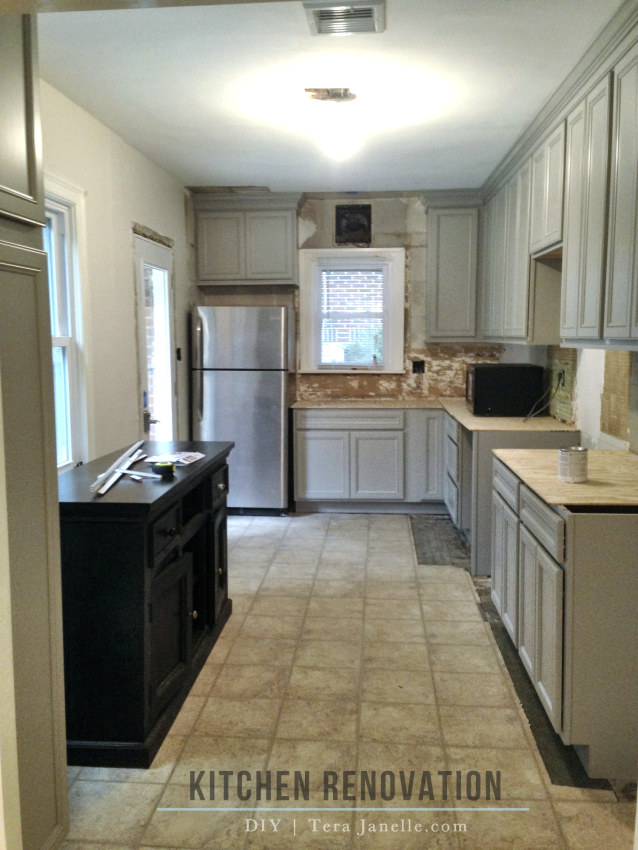
BEFORE
AFTER DEMO
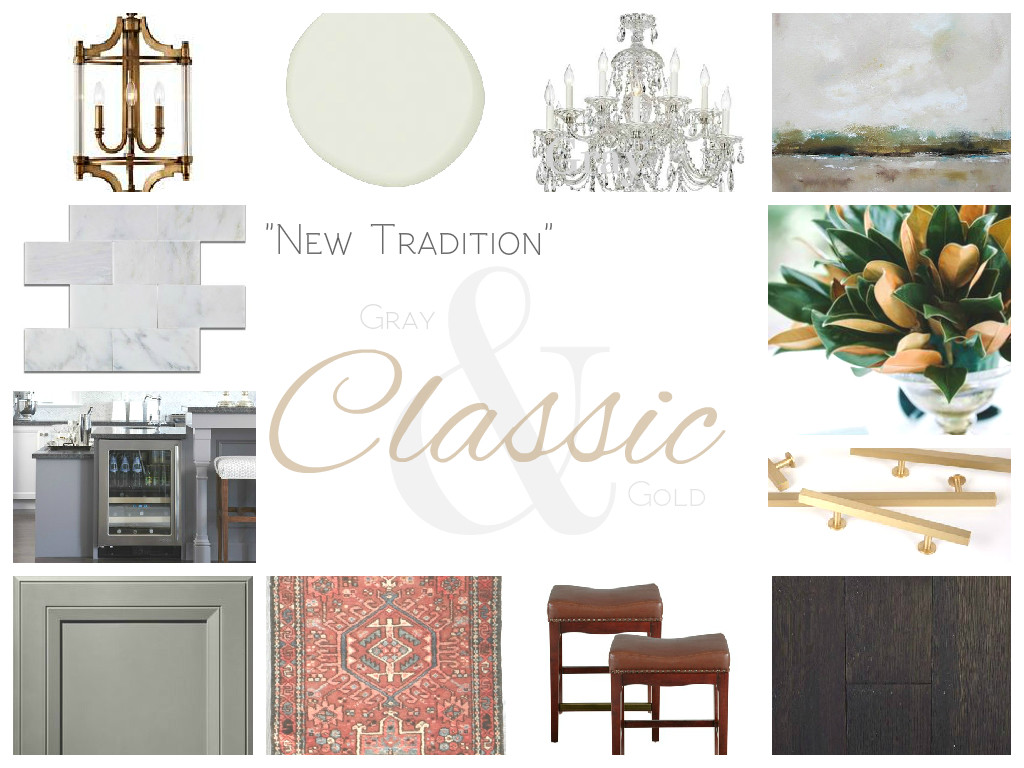
And here’s the Design Plan and details:
And here we are at Cabinet Delivery Day!! (Insert dancing and squeals of joy)
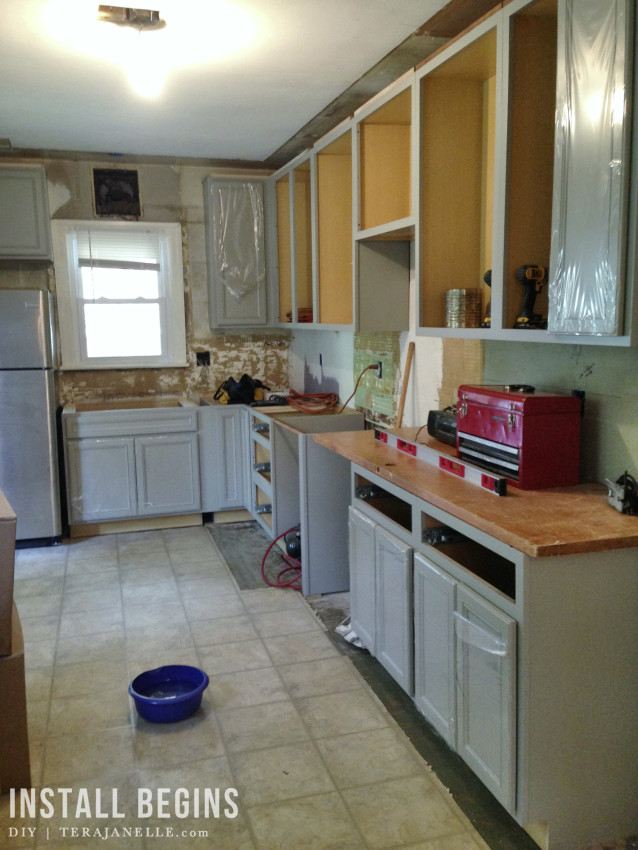
And Cabinet Install Day!! (More dancing and squeals of joy)
FLOORS:
We priced installing wood floors in the kitchen, to match the rest of the house. Beyond the budget. I wanted something mop-friendly, because we have a Black Labrador who has an affinity for tracking Virginia mud into the kitchen. And if you’ve ever lived in the South, you know red clay mud is pure evil. But I also wanted a product that offered the visual warmth and cohesive flow of wood floors, which we have on the rest of the main level. So we decided to go with a waterproof vinyl plank floor, which we will install after the cabinets. To prep for cabinet install, we cut back the current sheet vinyl to expose the sub floor, and then we installed the cabinets directly on top of the subfloor. This serves two purposes: 1) to prevent buckling and 2) ease of replacement. It allows the floating floors which we will install later to expand and contract (cabinets sitting atop the floating floors make that difficult). By allowing this slight expansion and contraction, we avoid the risk of buckling. Also, if we were to decide to change the floors in the future, we can leave the cabinets in place.
So now that we’ve had to nix the real wood floors from the budget, we’re shopping for floating vinyl plank options. (Maybe this TrafficMaster Vinyl Plank flooring?)
CROWN MOLDING & CRAZY WALL PAPER:
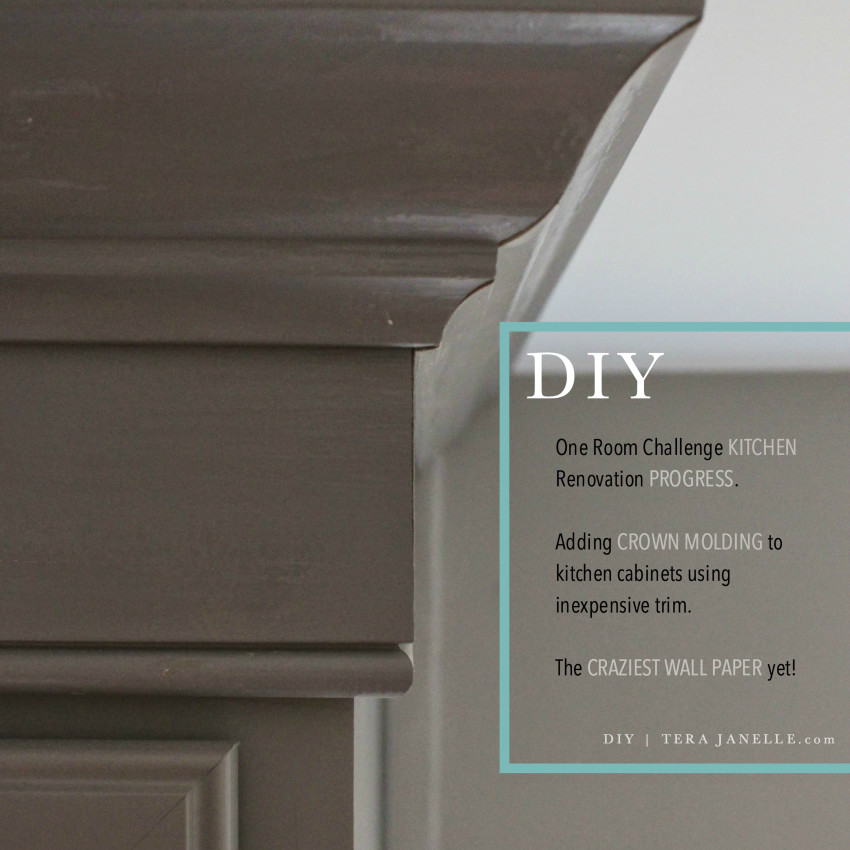
We bought stock baseboard and standard crown molding from Lowes to create a double-stacked crown molding for the kitchen cabinets. 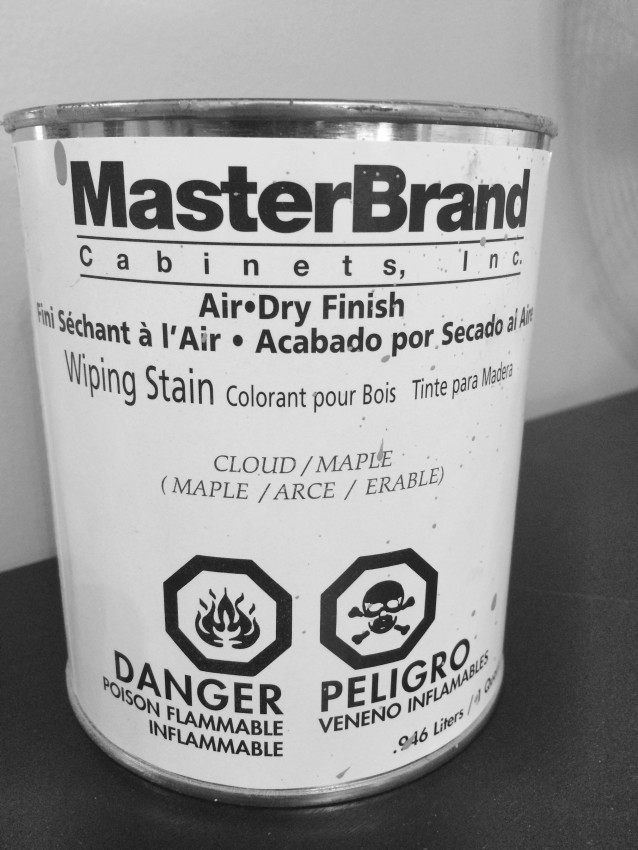 Then I bought a (ridiculously expensive, like $48 expensive!) quart of the factory cabinet paint to paint the moldings. In the past I’ve tried color matching cabinets in standard paint, but by the time I’ve narrowed down the color and finish to “match” the cabinets, I’ve spent $20 in paint samples, four trips to Lowes, and an entire weekend. So for time and headaches sake, I gave in and bought the (did I mention ridiculously expensive?) matching paint through Diamond cabinetry.
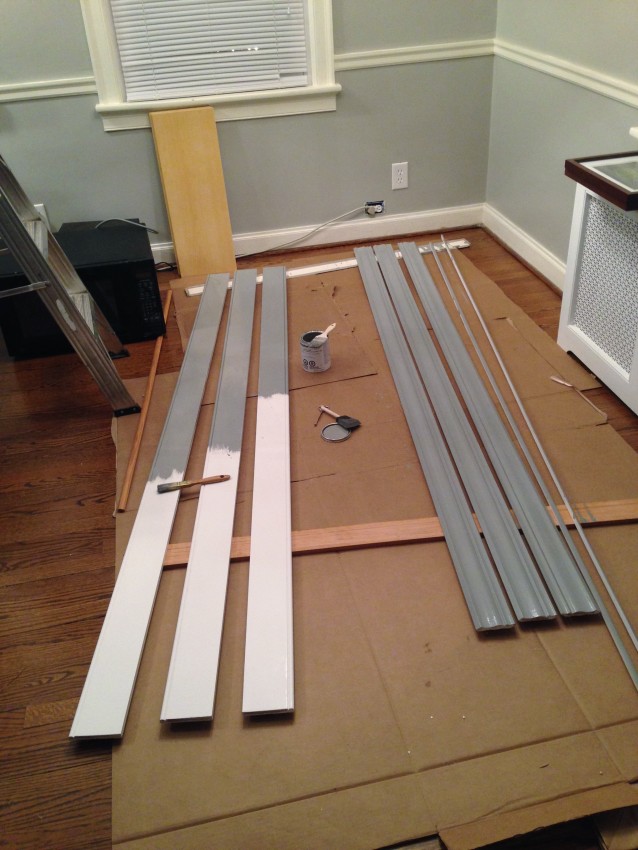
But to my crazy-utter surprise, the factory Diamond/MasterBrand Cabinet paint is INCREDIBLE, like no paint or stain I’ve ever used! It was worth the extra money. (Side note: I was not paid to say this. I’m pretty sure Diamond/MasterBrand Cabinetry has no idea I exist.) The cabinet paint is actually called a “wiping stain” and is best applied with a sprayer – but that was a whole lot of hassle I wasn’t up for. A foam roller and foam brush worked well enough. The wiping stain dries quickly with a lovely thick lacquer/enamel finish, so I had to work quickly! Also, as it dries it gets stringy/whispy, like cotton candy. So it took a bit of practice to get the application just right, but without a doubt – I’ll be ordering this magic wiping stain in the future! (Sidenote: The fumes are pretty intense, so be sure to ventilate.) This is the closest product I’ve found for replicating an enamel, manufacturer-like finish. The color matches the cabinet color exactly, though the finish is slightly glossier. If anything, though, I like how the slightly glossier sheen highlights the crown.
Here’s a close up of that stacked crown and the craziest wall paper we’ve ever discovered during a remodel! Soldiers & Wizards? It is so bad I think it has crossed over to kinda awesome! 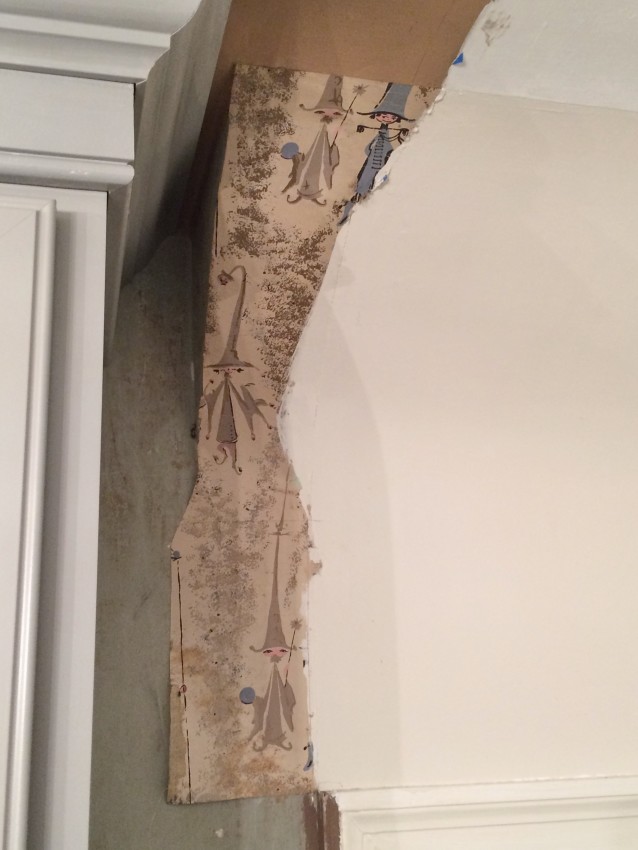
For adding elaborate crown to your own cabinets (on a real life budget!), simply stack layers of stock trim molding. We used an upside down baseboard and standard crown molding, as shown here:

See a video tutorial by Ron Hazelton here. (We omitted the part in Step 5 where he adds base trim on the ceiling and instead attached base only to the front of cabinets, and then we moved on to Step 6.)
And here’s how ours turned out — I love the notion of grandness and sophistication it adds to the kitchen! (Sorry about the crazy lighting differences. The cabinets are a warm gray, like in the close-up photo of the crown.)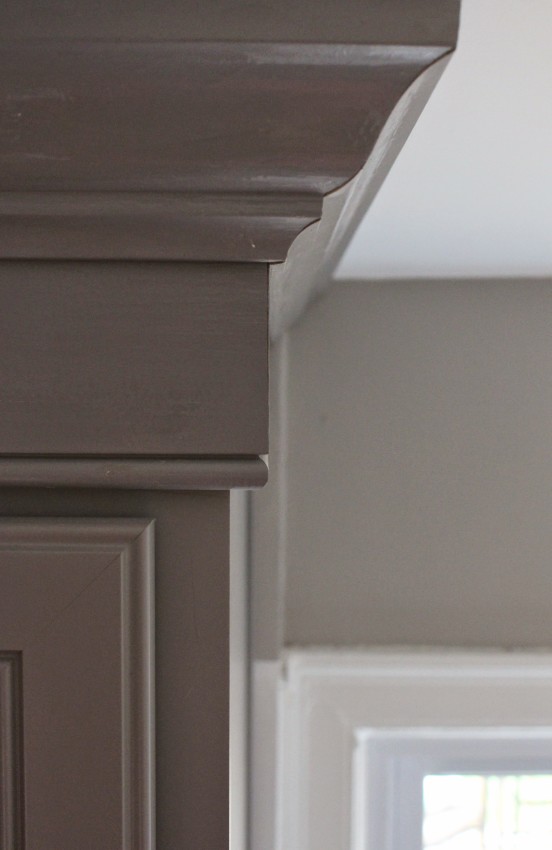
Here’s that “BEFORE” shot again —
And here we are so far!!
So now we have cabinets, but still no sink. So we (awkwardly) lifted that blasted laundry sink into the sink cabinet base, and hooked the plumbing up to it again. Because a girl needs a kitchen sink, of some sort! #renovationrealities
I’ll be back tomorrow with our design plan for a custom peninsula where the black buffet cabinet now sits. Prepare yourself for (unimpressive) design sketches, but I think I’m going to love the final build! We do better with wood and power saws than paper and pencil. ;) The peninsula will provide a casual eat-in spot and loads of extra counter space!
In the meantime, you can check on the progress of the other One Room Challenge participators here: One Room Challenge!


It’s looking good! I just finished my kitchen (after 5 long years) so I’m jealous that you are not yours ok so quickly!
Thank you, Jill. It’s finishing that last 20% of a project that drags on for years and years around here! We get to 80% and say, Ah – good enough. :) Next project. So The One Room Challenge is helping to make sure we finish the WHOLE 100% of the kitchen–like shoe around the cabinets, goodness – who wants to do that part?! Boring. :)
When you day you’ll buy the cabinet paint again what project do you have in mind? Future crown matching? or would you think it’s worth the splurge if your painting the cabinets you already have? Or some entirely different project?
I was thinking the wiping stain would be great for painting furniture, because the finish can take a beating! It is more cumbersome to work with than paint, though, so it might get exhausting trying to tackle a whole kitchen cabinet facelift with it (unless you were using a sprayer). I would consider buying one quart and trying a sample door? It’d be worth the $48 to do a sample run, to be sure!
*say, not day
Hot dang that’s a lot of progress! Looking great
Yay, thank you! As I confess on the blog, we got a head start several of months ago — the cabinets took 6 weeks to come in and then 2 more weeks before they could be installed. I’m happy to be past all the waiting now, and onto the pretty stuff!! :)
The cabinets look wonderful!!! And that wallpaper cracks me up!
Thank you!! And seriously, that wallpaper! :)